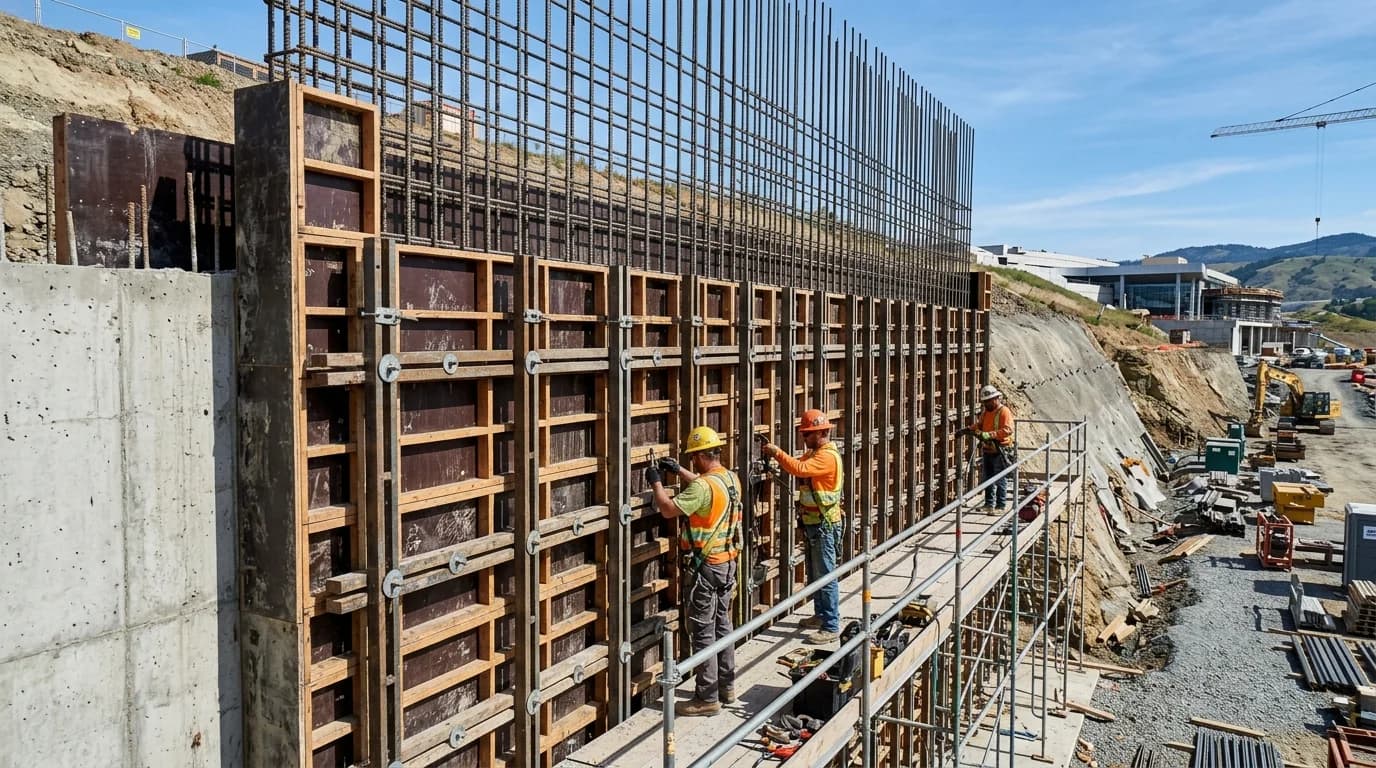
Under ACI 347 and IRC Section R404, poured concrete walls require formwork engineered to withstand fresh concrete lateral fluid pressure (150 pounds per cubic foot, yielding 1,200 PSF burst pressure at the base of an 8-foot wall). Standard assemblies utilize 3/4-inch MDO plywood or modular steel-ply panels reinforced with double 2x4 horizontal walers and vertical strongbacks, clamped with 3,000-lb tensile snap ties spaced 24 inches on-center. Continuous structural reinforcement requires Grade 60 #4 or #5 rebar grids tied to footing dowels with a 2-inch clear concrete cover. Always place 3,500–4,000 PSI ready-mix concrete in maximum 4-foot lifts and consolidate thoroughly with an internal pencil vibrator to prevent aggregate honeycombing.
1. Hydrostatic Bursting Pressure & Formwork Engineering
The primary engineering challenge in constructing cast-in-place concrete walls is formwork design. When concrete is discharged from a ready-mix chute or concrete pump boom, it behaves as a heavy, viscous liquid with a unit density of approximately 145 to 150 pounds per cubic foot (pcf). Under ACI 347R-14 (Guide to Formwork for Concrete), the maximum lateral pressure \(P\) exerted on vertical wall forms is calculated based on placement rate, liquid temperature, and chemistry:
A single square foot of formwork at the bottom of an 8-foot wall must resist more than half a ton of lateral force trying to rip the plywood seams apart. A form blowout during a pour is catastrophic: thousands of pounds of wet concrete spill across the subgrade, framing collapses, and clean-up costs run into thousands of dollars.
To resist these immense bursting forces, professional builders construct forms using either prefabricated modular steel-ply panels (such as Symons or Western forms) or job-built lumber assemblies. Job-built formwork requires high-density overlaid (MDO) 3/4-inch exterior-grade plywood backed by horizontal double 2x4 "walers" running continuously every 24 inches vertically. Vertical 2x4 or 4x4 "strongbacks" are erected every 6 to 8 feet to maintain dead-flat alignment. Steel snap ties rated at 3,000 to 5,000 pounds ultimate tensile capacity penetrate the form walls every 24 inches horizontally and vertically, held tight with heavy cast-steel wedges or Jahn A-brackets.
2. Footing Preparation, Keyways & Rebar Dowel Anchorage
A poured concrete wall cannot stand directly on raw earth. Under IRC Section R403, it must rest upon a monolithic poured concrete spread footing sized to distribute structural loads into undisturbed native soil with a bearing capacity of at least 1,500 to 2,000 PSF. For an 8-inch-thick residential foundation wall, code dictates a minimum footing width of 16 inches and a footing thickness of 8 inches, poured below the regional frost line.
Two mechanical connection elements must be integrated into the footing while the concrete is still wet:
- Continuous Shear Keyway: An oiled 2x4 (measuring 1.5 inches deep by 3.5 inches wide) is pressed down into the center of the wet footing along the wall centerline and removed after initial set. This creates a recessed channel (shear key) that mechanically locks the footing and wall together, preventing lateral earth pressures from sliding the bottom of the wall inward.
- Vertical Rebar Starter Dowels: Grade 60 #4 (1/2-inch diameter) rebar dowels bent into 90-degree "L" shapes are embedded at least 6 inches into the footing with 24 to 30 inches projecting vertically into the future wall form. These dowels are placed at 16 to 24 inches on-center to lap-splice with the wall reinforcement cage.
- Hydrophilic Waterstop (For Basements): For conditioned basements in high water-table soils, a hydrophilic bentonite or swellable polymer waterstop strip is nailed into the keyway joint before closing forms. When groundwater contacts the joint, the strip expands up to 300%, forming an impermeable rubber gasket that blocks cold-joint moisture migration.
3. Structural Comparison: Poured Concrete Wall vs. CMU Block Wall
Contractors regularly weigh poured monolithic concrete against concrete masonry unit (CMU) cinder block construction. Compare structural, moisture, labor, and financial performance metrics:
| Engineering Parameter | Poured Concrete Wall (Monolithic) | CMU Cinder Block Wall (Mortared) | Governing Standard |
|---|---|---|---|
| Compressive Strength | 3,500 – 4,500 PSI (Monolithic) | 1,900 – 2,500 PSI (Mortar joint dependent) | ASTM C94 vs ASTM C90 |
| Lateral Earth Resistance | Superior (Continuous flexural rebar tension) | Moderate (Subject to bed-joint stair-step shear) | IRC Section R404 |
| Waterproofing Integrity | High (Zero mortar joints; monolithic barrier) | Vulnerable (Thousands of linear feet of mortar joints) | IRC Section R406 |
| Placement Duration | 1 Day Pour (Post-form erection) | 4 to 7 Days (Course-by-course laying) | Field Productivity Standard |
| Required Trade Skill | Formwork carpenter & pump crew | Master journeyman bricklayer | TMS 402 / ACI 530 |
| 2026 Turnkey Cost / Sq Ft | $14.00 – $22.00 / sq ft installed | $11.00 – $18.00 / sq ft installed | 2026 US National Averages |
4. Rebar Reinforcement Schedules & Clear Cover Standards
Unreinforced concrete has tremendous compressive strength but virtually zero tensile capacity (only about 10% of its compressive rating). As backfill soil exerts inward horizontal thrust against a foundation or retaining wall, the exterior face of the wall is placed into compression while the interior face experiences intense tension. Steel rebar must be positioned precisely to absorb these tensile flexural loads.
Under ACI 318-19 and IRC Section R404, prescriptive reinforcement schedules require:
- Vertical Rebar: Grade 60 #4 (1/2-inch) or #5 (5/8-inch) deformed steel bars spaced at 16 inches or 24 inches on-center. For retaining walls or basement walls supporting over 7 feet of backfill, vertical rebar is placed closer to the tension side (the interior face for retaining walls with backfill on the exterior), while strictly maintaining a minimum 2 inches of clear concrete cover between the steel and exterior form face.
- Horizontal Rebar: Minimum two continuous horizontal #4 bars in the top 12 inches of the wall and two horizontal #4 bars in the bottom 12 inches, with intermediate bars spaced no more than 24 inches on-center throughout the wall height to control shrinkage and temperature cracking.
- Lap Splices & Corner Detailing: All rebar lap splices must measure a minimum of 40 bar diameters (20 inches for #4 rebar, 25 inches for #5 rebar). At all wall intersections and 90-degree outside corners, continuous horizontal bars must be supplemented with 24-inch x 24-inch bent corner "L-bars" to prevent diagonal tensile corner tears.
- Plastic Chairs and Spacers: Rebar cages must never be supported by scrap wood, brick fragments, or bare wire contacting formwork. Use clip-on plastic wheels or heavy-duty rebar chairs to lock the reinforcement at its exact engineering depth.
5. Concrete Mix Placement in 4-Foot Lifts & Mechanical Consolidation
Pouring an 8-foot-tall wall in one continuous, uncontrolled drop is a recipe for form rupture and heavy aggregate segregation. Coarse 3/4-inch gravel drops faster than cement slurry, resulting in massive gravel "honeycombs" at the base of the wall where strength is needed most.
Follow the standard American Concrete Institute (ACI 309R) placement protocol:
- Place in Controlled 4-Foot Lifts: Deposit concrete around the entire wall perimeter in continuous horizontal layers (lifts) no deeper than 4 feet. Once the first 4-foot lift is placed and consolidated around the perimeter, begin the second 4-foot lift. This allows initial chemical set to commence at the base, reducing peak hydrostatic head pressure on bottom walers.
- Internal Immersion Vibration: Insert a high-frequency internal pencil vibrator (1-inch to 1.5-inch head operating at 10,000+ VPM) vertically into the fresh concrete at 18-inch intervals. Lower the vibrator rapidly through the lift and allow it to penetrate 6 inches into the prior lift below. This fuses the two lifts into a single monolithic mass, preventing a cold joint.
- Vibrator Dwell Time: Hold the vibrator stationary for 5 to 12 seconds until the surface glistens and large air bubbles stop bubbling to the surface, then withdraw slowly at a rate of 3 inches per second. Never drag the vibrator horizontally through the formwork—dragging pulls cement paste away from aggregate and creates vertical sand streaks.
- Anchor Bolt Placement: While the top 12 inches of concrete is still plastic, screed the top surface flat to chalk lines. Press 1/2-inch or 5/8-inch galvanized J-bolts down into the center of the wall at least 7 inches deep, spaced within 12 inches of all corners and every 4 to 6 feet along the run, to securely anchor the wood mudsill under IRC Section R403.1.6.
6. Stripping Forms, Moist Curing & IRC Sub-Grade Waterproofing
Form stripping marks the transition from placement to curing. Do not rush form removal during cold weather:
In temperatures above 60°F, vertical formwork panels can be safely disassembled after 24 to 48 hours. Carefully remove snap-tie wedges, back out walers, and gently pry form panels outward using wooden wedges—never strike the green concrete directly with steel pry bars. Snap off the protruding steel tie ends inside the wall cavities using a tie-break tool, and patch the recessed cone holes with non-shrink hydraulic cement mortar (ASTM C1107).
Under ACI 308R, concrete must be cured immediately following form stripping. Apply an ASTM C309 membrane-forming curing compound or wrap the green wall with wet burlap and poly sheeting for 7 days to maintain internal moisture. Uncured concrete allowed to dry rapidly in sun and wind loses up to 50% of its potential compressive strength and develops deep shrinkage fissures.
Before any soil is backfilled against a habitable basement wall, IRC Section R406 mandates an approved waterproofing system:
- Elastomeric Rubber Membrane: Apply an 80-mil thick liquid rubberized asphalt or polymer membrane (such as Tremco or Mar-Flex) across the entire exterior below-grade face, extending down onto the footing face. Standard thin black dampproofing tar is not waterproof; it merely retards vapor transmission.
- Dimpled Drainage Board: Install a heavy-duty dimpled high-density polyethylene (HDPE) drainage board over the cured membrane. The dimples create an air gap that channels hydrostatic groundwater directly down to a perforated 4-inch footing drain pipe embedded in washed crushed stone, relieving lateral water pressure before it touches the concrete.
5 Costly Mistakes to Avoid When Building Poured Concrete Walls
Filling an 8-foot or 9-foot wall form to the brim in 20 minutes generates unbearable hydrostatic head pressure exceeding 1,300 PSF at the bottom ties. Waler clamps snap, plywood splits, and tons of wet concrete explode across the footing. Always pour in controlled 4-foot lifts, allowing lower concrete to begin its initial set before topping out the wall.
Leaving an immersion vibrator in one spot for over 20 seconds forces coarse stone aggregate downward while driving watery cement paste to the surface and form face. Dragging the wand horizontally leaves weak vertical sand channels that act as future water leaks. Insert vertically, hold for 5 to 10 seconds, and withdraw smoothly.
Tying rebar so it rests against the wooden or steel form face leaves zero concrete encasement. Once forms are stripped, bare steel is exposed to groundwater and oxygen. Rust expands steel up to 600% by volume, fracturing the concrete surface within 2 to 5 years (spalling). Always maintain 2 inches of clear concrete cover using plastic side-spacer wheels.
Hydration chemical kinetics slow by over 50% when ambient temperatures drop below 45°F. Stripping forms after 24 hours during autumn or winter pours can cause green concrete to crumble or develop deep micro-fractures under its own weight. Keep forms in place for 72+ hours and protect with insulated thermal blankets during cold weather.
An unbraced foundation wall acts as a cantilever beam pinned only at the footing keyway. Pushing thousands of pounds of damp backfill dirt against a freestanding 8-foot wall before the subfloor floor joists and subflooring are installed will snap the wall at the keyway or tilt the top inward by several inches. Never backfill until the structural floor diaphragm is fully anchored.
Need to Calculate Ready-Mix Yardage or CMU Alternatives?
Compute exact concrete cubic yards, rebar tonnage, and block wall comparisons with our verified engineering calculators.
Frequently Asked Questions
How thick does a residential poured concrete foundation wall need to be?
Under IRC Section R404.1.2, residential cast-in-place concrete foundation walls supporting light-frame construction with up to 7 feet of unbalanced backfill must have a minimum nominal thickness of 8 inches. When unbalanced backfill exceeds 8 feet or soil lateral pressures exceed 45 pounds per square foot per foot of depth, wall thickness must increase to 10 or 12 inches with engineered rebar schedules.
When can forms be safely removed from a poured concrete wall?
According to ACI 347 recommendations, vertical formwork panels can be stripped after 24 to 48 hours in moderate temperatures (60°F to 75°F) provided the concrete has reached sufficient compressive strength (typically 500 to 1,000 PSI) to support its own self-weight without surface spalling. However, heavy backfilling or structural framing loads must wait 7 to 28 days until structural design strength is verified.
How much lateral fluid pressure does wet concrete exert on wall forms?
Freshly placed liquid concrete behaves as a heavy plastic fluid with an equivalent fluid density of approximately 150 pounds per cubic foot. At the bottom of an 8-foot-tall vertical wall pour, hydrostatic bursting pressure reaches roughly 1,200 pounds per square foot. Form ties rated at 3,000 to 5,000 pounds ultimate tensile capacity spaced on 24-inch grids are required to prevent catastrophic form blowout.
What ready-mix concrete specification is best for poured walls?
Specify ASTM C94 ready-mix with a minimum 28-day compressive strength of 3,500 to 4,000 PSI, a 0.45 maximum water-to-cement ratio, 3/4-inch nominal maximum size aggregate (#57 stone), and a 4-to-5-inch placement slump. If using a concrete pump boom, a mid-range water-reducing admixture (plasticizer) should be added to boost pumpability up to a 6-inch slump without diluting cement paste strength.
How long after pouring a foundation wall can you backfill with soil?
IRC Section R404 and structural engineering standards mandate that basement and retaining walls must not be backfilled until the concrete has cured for a minimum of 7 to 14 days and the first-floor diaphragm floor framing is fully installed and pinned to the top mudsill. Backfilling an unbraced green concrete wall will induce severe shear cracking or total inward wall rotation.
Building Codes & Primary Standards Cited
Guide to Formwork for Concrete
Authoritative American Concrete Institute specification for lateral pressure calculations, tie load limits, and stripping times.
International Residential Code - Foundation & Retaining Walls
Prescriptive building codes establishing wall thickness, unbalanced backfill limits, and rebar schedules.
Standard Specification for Ready-Mixed Concrete
Governs compressive strength testing, batch uniformity, slump limits, and mixing time tolerances.
Estimations adhere to standard North American modular 3/8-inch mortar joint physics and 5% to 10% material waste factors. Local municipal building inspectors, stamped architectural blueprints, and local frost depth requirements supersede general reference guidelines.
Popular Quick Estimates
Pre-engineered takeoffs & benchmarks matched to this project
Related Calculators
Specialized tools for foundation, core fill, and budgeting
Heavyweight structural blocks and bond beam units
Cubic yards, bags, and slab volume for flatwork and footings
Straight and multi-wall runs with mortar and waste allowances
Installed cost per square foot and full budget forecast
Blogs & Construction Guides
Technical articles, IRC code standards, rebar schedules & freight logistics
How to Build a Cinder Block Retaining Wall (IRC Guide)
How to Build Concrete Steps: Formwork, Codes & Pouring
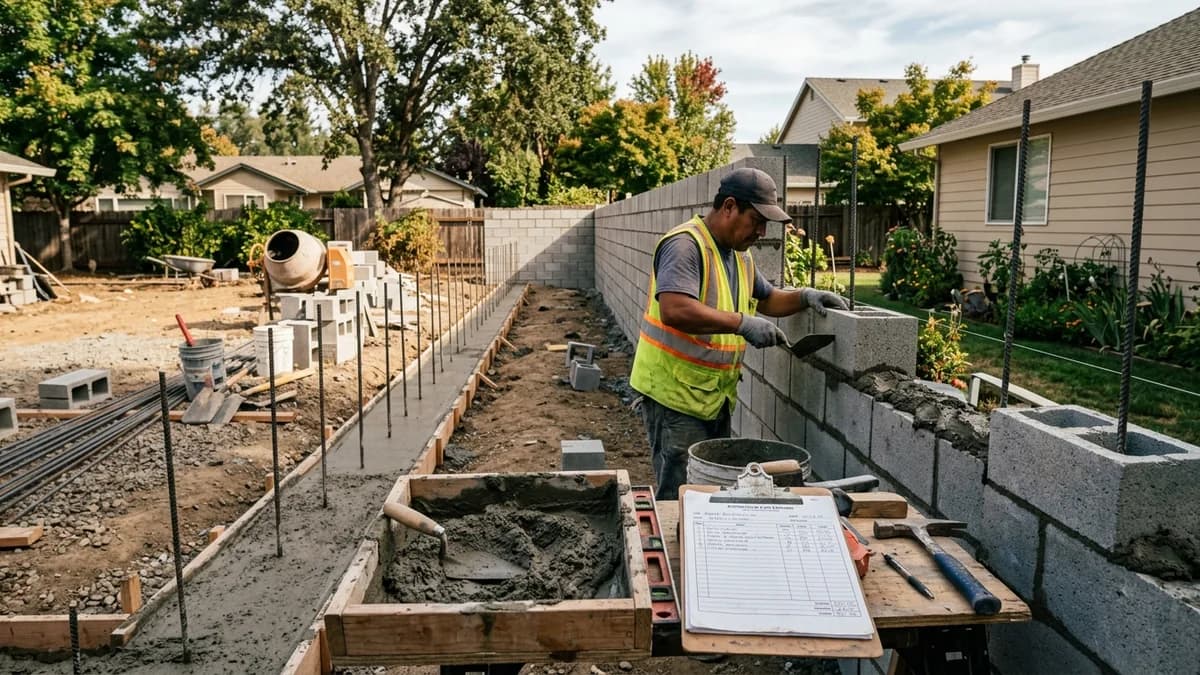
Cost to Build a Cinder Block Wall (2026 Rates)