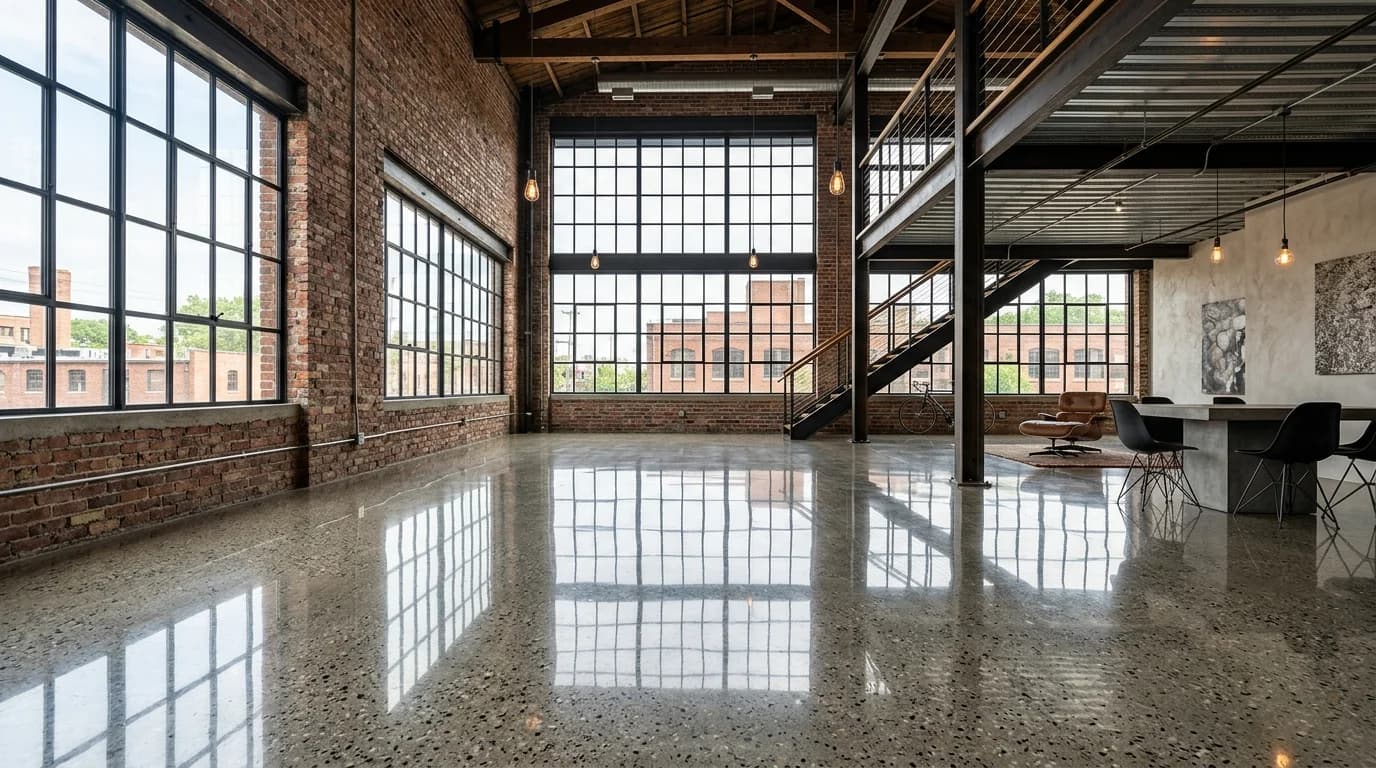
Under ACI 310.1 and CSDA polishing guidelines, true polished concrete is produced by progressively grinding the slab with coarse metal-bond diamond segments (30 to 120 grit) to establish flatness and aggregate exposure, followed by applying a penetrating lithium silicate densifier to chemically bind unhydrated free lime into crystalline calcium silicate hydrate (C-S-H). The slab is then honed and polished through sequential resin-bond diamond discs (from 100 up to 1,500 or 3,000 grit) to achieve glass-like specular clarity, finished with a penetrating micro-guard sealer buffed with a 2,000+ RPM high-speed propane burnisher.
1. The Science of Polished Concrete: Hardness & Vitrification
Standard poured concrete is an inherently porous material. Its surface paste consists largely of cement hydration byproducts, primarily calcium silicate hydrate (C-S-H) along with 20% to 25% non-structural, water-soluble calcium hydroxide (also known as free lime). This free lime is soft (scoring only 2 to 3 on the Mohs mineral hardness scale), chalky, and vulnerable to acid etching, moisture penetration, and tire wear (surface dusting).
Mechanical concrete polishing is not a coating. It is a systematic process of refining the slab itself:
- Mechanical Planing: Rotary diamond grinding heads shave away the weak top laitance and expose hard quartz sand or stone aggregate (scoring 6 to 7 on the Mohs scale).
- Chemical Vitrification: Applying an aqueous silicate densifier initiates a secondary pozzolanic reaction with free calcium hydroxide:Chemical Reaction: Ca(OH)2 + SiO2 → C-S-H (Calcium Silicate Hydrate)The newly formed C-S-H crystal matrix swells inside the capillary pores, locking the microstructure together into a dense, non-porous mass that resists abrasion under ASTM C779 testing.
- Optical Micro-Refinement: Progressively finer resin-bonded diamond abrasives polish the vitrified surface until microscopic peaks and valleys are smaller than the wavelength of visible light, producing clean specular reflection without plastic film coatings.
2. Aggregate Exposure Classes: From Cream to Heavy Stone
The Concrete Polishing Association of America (CPAA) and CSDA categorize polished concrete into four distinct aggregate exposure levels, determined by the depth of initial metal-bond grinding:
Only the surface cement paste (cream) is polished. No aggregate is exposed. Requires an exceptionally flat, unblemished power-troweled slab. Modern, minimalist, and cost-effective.
Light grinding removes 1/16 inch of paste to expose fine sand particles and tiny aggregate specks. The most popular choice for retail stores and modern contemporary homes.
Grinding shaves 1/8 inch into the slab to reveal 1/4-inch to 1/2-inch stone chips throughout 80% of the surface area. Produces an organic terrazzo-like appearance.
Aggressive deep cutting removes 1/4 inch or more to slice through large 3/4-inch gravel and river stone. Requires heavy 1,000+ lb planetary grinders and higher diamond tooling budgets.
3. Standard CSDA Tooling & Grit Progression Matrix
Skipping grit passes is the most common reason DIYers and inexperienced operators end up with dull, swirled floors. Follow this verified multi-pass tooling schedule:
| Polishing Phase | Tooling Type & Matrix | Grit Rating | Surface Profile & Sheen | Chemical Application |
|---|---|---|---|---|
| Coarse Cut | Metal-Bond Segments | 30 / 40 Grit | Rough profile (CSP 2), removes adhesives/high spots | Dry vacuum / HEPA dust shroud |
| Medium Grind | Metal-Bond Segments | 70 / 80 Grit | Removes 30-grit gouges, opens micro-pores | Grout coat / pinhole slurry fill |
| Fine Grind | Metal-Bond Segments | 120 / 150 Grit | Smooth matte surface, zero visible swirl gouges | Apply Lithium Silicate Densifier |
| Transition Hone | Ceramic / Hybrid Transitional | 100 / 200 Grit | Erases metal-bond scratches, pre-sheen | Cured densifier micro-reaction |
| Honing Polish | Resin-Bond Diamond Discs | 400 Grit | Level 2 low luster satin sheen (20-30 gloss units) | Clean microfiber mop |
| Semi-Gloss Polish | Resin-Bond Diamond Discs | 800 Grit | Level 3 clear reflection of overhead lights (40-50 GU) | Optional secondary densifier mist |
| High-Gloss Mirror | Resin-Bond Diamond Discs | 1,500 / 3,000 Grit | Level 4 crystal mirror clarity, crisp image reflection (60+ GU) | Micro-Guard Sealer + Propane Burnish |
4. Chemical Densifiers: Lithium vs. Sodium vs. Colloidal Silica
Chemical densification is the biological heart of polished concrete. Without densification, a ground slab cannot achieve high gloss; soft cement paste quickly micro-fractures under diamond pads, turning gray and cloudy.
- Lithium Silicate (State-of-the-Art Standard): Lithium ions are significantly smaller than sodium ions. This allows lithium silicate to penetrate up to 1/4 inch into concrete capillary pores. It reacts uniformly with calcium hydroxide to form insoluble C-S-H crystals. It requires zero rinsing or squeegeeing—simply spray it evenly at 400 to 600 square feet per gallon, keep the surface wet for 20 minutes with a microfiber mop, and let it dry.
- Sodium Silicate (Traditional Legacy): Requires heavy flooding (150 to 200 sq ft/gal) and manual machine agitation with nylon brushes for 30 to 45 minutes as it turns into a gel. If not completely flushed off with clean water before drying, excess unreacted sodium silicate forms a rock-hard white crust (known in the trade as "whiting" or "alkaline bloom") that requires re-grinding with metal diamonds to remove.
- Colloidal Silica (Nano-Engineered): Composed of discrete, amorphous sub-micron silicon dioxide particles (5 to 20 nanometers) suspended in water. Because the silica is already synthesized, it reacts almost instantaneously upon contact with calcium hydroxide, making it exceptionally effective on soft, punky, or newly placed concrete slabs.
5. Stain Guards & High-Speed Propane Burnishing (2,000+ RPM)
While a 3,000-grit diamond polish creates brilliant specular gloss, concrete remains inherently susceptible to oil, red wine, mustard, and acid stains if left untreated. Liquid spills will slowly penetrate the micro-pores and etch the calcium silicate crystals.
The final finishing step is applying an approved penetrating stain guard:
A concrete stain guard is a breathable, semi-penetrating hybrid copolymer (incorporating fluoropolymers and sub-micron silicate resins). Unlike thick topical epoxy or polyurethane sealers, a stain guard forms an ultra-thin sub-micron barrier inside the surface pores without forming an easily scratched plastic film.
The Burnishing Thermal Lock: Immediately after the micro-guard is applied with an acetone sprayer and microfiber applicator pad, it must be cured using a heavy, high-speed propane or electric burnisher operating at 2,000 to 2,500 RPM fitted with diamond-impregnated or natural hogs hair pads. Friction from the high-speed pad generates surface temperatures exceeding 100°F to 120°F. This thermal energy melts and bonds the copolymer resins deep into the concrete pores, creating a durable, liquid-repellent shield with unmatched specular clarity.
5 Costly Mistakes to Avoid When Polishing Concrete Floors
Jumping directly from an 80-grit metal grind to a 400-grit resin pad without running 120-grit metal and 200-grit transitional pads is disastrous. Resin pads cannot remove the deep scratch valleys left by coarse metal diamonds. The floor may look shiny from a standing distance, but under point lighting, thousands of unsightly scratch swirls will be permanently entombed in the surface.
Diamond segments are held in a metal bond matrix designed to wear away and expose fresh diamond crystals. Using a soft-bond diamond on soft, abrasive concrete causes the matrix to erode instantly, wasting $500 in diamonds in 20 minutes while gouging deep ruts into the slab. Conversely, running a hard-bond diamond on hard 5,000 PSI concrete causes diamond glazing, where the tool slides across the floor without cutting.
Pouring sodium silicate densifier across a floor and walking away to let it dry creates a chalky white film of insoluble alkaline residue (whiting). Once dried, this glassy white crust cannot be dissolved with water or detergents—it can only be stripped by backing up several steps in the grinding sequence and re-cutting the slab with coarse metal-bond diamonds.
Never apply standard solvent-based or water-based acrylic clear coats over a concrete slab polished above 200 grit. The densified, vitrified surface is too dense for topical acrylic resins to achieve mechanical adhesion. Within 3 to 6 months of foot or vehicle traffic, the acrylic film will scratch, turn milky white from trapped moisture vapor, and peel off in large flakes.
Commercial cleaning crews often clean with household white vinegar, Pine-Sol, or acidic tile detergents. Acids react instantly with calcium silicate hydrate crystals, dissolving the polished micro-plane and turning the glossy floor into a dull, cloudy gray shadow. Educate building owners to specify strictly pH-neutral cleaners (pH 7.0) for daily maintenance.
Estimating Concrete Slab Pouring or Flooring Costs?
Compare polished concrete material budgets, ready-mix yardage, and epoxy alternatives with our verified pricing tools.
Frequently Asked Questions
How much does it cost per square foot to polish a residential concrete floor?
In 2026, professional mechanical concrete polishing typically costs $3.50 to $8.50 per square foot for residential basements and living areas. Basic commercial cream polishes (low aggregate exposure with an 800-grit satin finish) start around $3.00 to $4.50 per square foot, while high-end residential jobs requiring deep aggregate cutting, extensive crack repair, and 3,000-grit high-gloss mirror finishes range from $7.00 to $12.00 per square foot.
What is the difference between lithium silicate and sodium silicate densifiers?
Lithium silicate features smaller, more reactive molecules that penetrate deeper into the concrete micro-pores (1/8 to 1/4 inch) and react rapidly with free calcium hydroxide without forming heavy surface efflorescence. It is a 'spray, spread, and leave' application. Older sodium silicate densifiers require heavy saturation, continuous scrubbing for 30 to 45 minutes, and laborious squeegeeing and water flushing to avoid permanent white alkaline crusting (whiting).
Can any existing concrete slab be polished to a mirror finish?
Almost any structurally intact slab can be polished, but the existing slab condition dictates the visual outcome. Slabs with severe waviness, deep tire ruts, old plumbing trenches, or low compressive strength (under 2,500 PSI) will exhibit varied aggregate patterns, ghost marks, and pitting. Slabs that are soft or spalling must be hardened with heavy densification or pre-treated with a 3/8-inch self-leveling cementitious polishable micro-topping.
Is polished concrete slippery when wet?
Surprisingly, no. Despite its glass-like mirror appearance, mechanically polished concrete treated with a penetrating stain guard meets or exceeds ANSI/NFSI B101.1 wet static coefficient of friction standards (SCOF > 0.60). The microscopic surface pores create micro-suction under shoe soles. However, like any hard surface, wet oily contaminants or standing puddles can create slip hazards unless cleaned promptly.
How do you maintain a polished concrete floor so it never loses its shine?
Daily dry dust-mopping with microfiber pads is critical to remove abrasive sand and grit that act like sandpaper under foot traffic. For wet cleaning, use exclusively pH-neutral concrete cleaners (pH 7.0). Never use acidic cleaners, vinegar, bleach, ammonia, or citrus degreasers, as acids micro-etch the vitrified calcium silicate surface and destroy the specular gloss. High-traffic commercial areas should be high-speed burnished with diamond-impregnated pads periodically.
Building Codes & Primary Standards Cited
Concrete Sawing & Drilling Association Polishing Guidelines
Defines official aggregate exposure classes A through D and specular gloss levels 1 through 4 for concrete floors.
Specification for Polished Concrete Floor Finishes
American Concrete Institute standard governing surface preparation, chemical densification, and diamond tooling progression.
Standard Test Method for Abrasion Resistance of Horizontal Concrete Surfaces
Standard testing methodology measuring wear resistance improvements in densified and polished concrete surfaces.
Estimations adhere to standard North American modular 3/8-inch mortar joint physics and 5% to 10% material waste factors. Local municipal building inspectors, stamped architectural blueprints, and local frost depth requirements supersede general reference guidelines.
Popular Quick Estimates
Pre-engineered takeoffs & benchmarks matched to this project
Related Calculators
Specialized tools for foundation, core fill, and budgeting
Heavyweight structural blocks and bond beam units
Cubic yards, bags, and slab volume for flatwork and footings
Core grout volume in cubic yards and 80-lb pre-mix bags
Step-by-step masonry formulas and corner waste rules
Blogs & Construction Guides
Technical articles, IRC code standards, rebar schedules & freight logistics
How to Clean Concrete Floors: Garage & Basement Guide
How to Paint Concrete Porches: Primers & Acrylic Paint
How to Cut Concrete Pavers: Angle Grinder & Splitters